Let’s be real—who doesn’t want that sparkling, movie-star smile without dropping a fortune at the dentist? I’ve been there—tried every “miracle” toothpaste, weird DIY hacks (yes, even baking soda and lemon—don’t do it), and let me tell you, it’s confusing. But after some trial, error, and a little patience, I finally found a 7-step at-home teeth whitening routine that actually works. And the best part? You don’t need a PhD in dentistry to get it done.
Here’s my guide, straight-up and no BS, so you can brighten that smile safely and effectively.
Step 1: Prep Your Teeth Properly
You wouldn’t paint a wall before cleaning it, right? Same with teeth. Prepping your teeth is crucial for whitening to actually work.
Brush and Floss First
Brush thoroughly: Get rid of plaque and surface debris that could block whitening agents.
Floss like a boss: Whitening won’t reach between teeth if gunk’s still there.
I know flossing can feel like wrestling with spaghetti, but trust me, it makes a huge difference in the end result.
Optional Rinse
Use an alcohol-free mouthwash to rinse away leftover toothpaste. This helps your whitening product work evenly across all surfaces.
Step 2: Choose the Right Whitening Product
Okay, this is where most people get overwhelmed. There’s a crazy variety out there: strips, gels, pens, LED kits—you name it.
My Personal Favorites:
Whitening strips: Easy, cheap, and effective for minor stains.
Whitening gels with trays: More intense, good for noticeable discoloration.
LED kits: Fancy, but IMO, they work best with gels, not alone.
Pro tip: Avoid charcoal powders or extreme DIY hacks—they can damage enamel if overused. Learned that the hard way.
Step 3: Apply Your Whitening Product Correctly
Here’s where many people mess up. Applying too much? Waste. Too little? Meh results.
Step-by-Step:
Follow the instructions—I can’t stress this enough. Different products have different concentrations.
Apply evenly: Cover every tooth surface, but don’t slop it on gums—they’re sensitive!
Set a timer: No cheating here. Overexposure can hurt your enamel and cause sensitivity.
Ever wondered why some people end up with ghost-white patches? Yeah… probably didn’t follow this part.
Step 4: Mind the Contact Time
Whitening isn’t instant magic; it takes a little patience.
Strips: Usually 20–30 minutes per session.
Gels in trays: Can range from 30 minutes to an hour.
LED kits: Follow the device’s recommended duration—usually 15–20 minutes.
Here’s a tip from personal experience: set a timer on your phone. Trust me, your teeth will thank you, and you won’t accidentally nap with strips stuck to your teeth (been there).
Step 5: Rinse and Remove Residue
After the timer dings, it’s time to rinse. Don’t just spit and move on!
How to Do It Right:
Rinse with lukewarm water to remove excess product.
Brush gently: A soft-bristled brush helps clean off residue without aggravating sensitive areas.
Avoid harsh rinses: Mouthwashes with alcohol can irritate recently treated enamel.
This step ensures your teeth are ready for maximum whitening effect and keeps your mouth happy.
Step 6: Protect Your Enamel
Here’s the part most people ignore: whitening temporarily weakens enamel, so you’ve got to baby it for a bit.
Simple Protection Tips:
Avoid staining foods/drinks for 24–48 hours: coffee, red wine, curry… you know the usual suspects.
Use a fluoride toothpaste: Strengthens enamel and reduces sensitivity.
Don’t overdo it: More whitening ≠ faster results. Stick to the recommended schedule.
I learned the hard way that chugging coffee right after whitening is basically tooth sabotage. Lesson learned.
Step 7: Maintain Your Bright Smile
You’ve done the hard work; now it’s about keeping that pearly glow.
Maintenance Tricks:
Touch-up once every 1–2 weeks: Depending on your product and lifestyle.
Regular brushing: At least twice a day with whitening-friendly toothpaste.
Straw power: Drink coffee, tea, or soda through a straw to limit staining.
Healthy snacks: Crunchy fruits and veggies like apples and carrots help naturally scrub your teeth.
Think of it like a fitness routine for your teeth—a little upkeep keeps your smile looking stellar.
Bonus Tips for Faster, Safer Whitening
Because I love giving extra value, here are a few things I wish I knew when I started my whitening journey:
Patch test first – Some gels can irritate gums, so test a tiny bit before full application.
Consistency beats intensity – Short, regular sessions work better than occasional long marathons.
Mind your habits – Smoking and heavy coffee/tea drinking undo whitening efforts faster than you can say “oops.”
LED kits are a helper, not a hero – They speed up gel action slightly but aren’t magic.
Common Mistakes to Avoid
Even with the best intentions, people screw this up. Here’s a quick heads-up:
Skipping prep: Leads to uneven whitening.
Overusing products: More is NOT better. Enamel is delicate!
Ignoring sensitivity: Pain is a signal—stop and adjust, don’t tough it out.
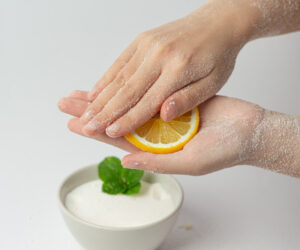
DIY extremes: Baking soda + lemon = temporary brightness + potential enamel disaster.
FYI, following the 7-step method consistently is far safer and more effective than these “hacks.”
My Personal Routine Snapshot
Just to make it relatable, here’s how I do it:
Brush & floss (morning).
Apply whitening strips in the evening for 30 minutes.
Rinse gently & avoid coffee after.
Repeat 3–4 times a week until I hit my desired shade.
Touch up every 2 weeks.
It takes discipline, but seeing your smile actually brighten week by week is ridiculously satisfying.
Final Thoughts
So there you have it—a 7-step at-home teeth whitening routine that’s practical, effective, and surprisingly easy to stick to. Whitening doesn’t need to be scary, expensive, or full of weird home experiments.
Remember, prep your teeth, choose the right product, follow timing instructions, protect enamel, and maintain your results. With a little patience and consistency, you’ll have a smile so bright people might need sunglasses.
And hey, if nothing else, at least now you know how to whiten safely without accidentally turning your teeth into chalk sticks. Your future self (and selfies) will thank you.