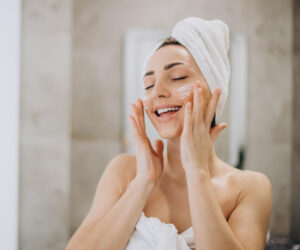
You know that moment when your skin feels like it auditioned for the role of sandpaper? I know it too. That moment pushed me into the wild world of sugar scrubs, and honestly, I never looked back.
I love them because they work fast, smell amazing, and make me feel like I own my life, even if my laundry says otherwise.
I make sugar scrubs at home because they cost less than my coffee habit, and they give better results than half the fancy jars I used to buy.
Ever wondered why sugar scrubs make skin glow so easily? Sugar exfoliates without picking a fight with your face.
No drama, no irritation, just instant glow and softness.
Stick with me and I’ll show you 6 DIY sugar scrub recipes for glowing, super-soft skin at home that I swear by.
Grab sugar, oil, and a spoon. Let’s do this.
Why DIY Sugar Scrubs Work Like Magic
The Science Without the Snooze-Fest
Sugar scrubs remove dead skin cells, boost circulation, and help your moisturizers sink in deeper.
They do this gently because sugar dissolves, unlike walnut scrubs that scratch your soul.
IMO, sugar wins every time.
Top benefits of DIY sugar scrubs:
Exfoliate dead skin without irritation
Improve blood flow for natural glow
Smooth rough patches like elbows and knees
Hydrate skin deeply when paired with oils
Work on most skin types, even sensitive ones
Ever noticed how skin looks brighter after a scrub? That’s circulation saying hello.
And hydration? That’s the oils carrying tiny moisture suitcases straight into your skin.
Fancy spas call it treatment. I call it Tuesday.

Tips Before You Start Scrubbing Like a Pro
The Rules (Yes, I Have Rules)
I mix my sugar scrubs fresh, I scrub gently, and I never exfoliate every day.
Daily scrubbing gives skin the emotional breakdown it never asked for.
2–3 times a week keeps peace in the kingdom.
FYI: Follow these golden tips
Use fine sugar for the face, coarse sugar for the body
Choose oils based on skin needs
Store scrubs in clean, airtight jars
Avoid scrubbing broken or wounded skin
Rinse with warm water, then pat dry
Always moisturize after exfoliating
Do you want scrubs that actually work? Follow the rules.
They’re annoying, sure, but your skin loves consistency.
Oil cheat sheet (bolded because it matters):
Coconut oil → deep hydration queen
Olive oil → rich, soothing, glow booster
Almond oil → lightweight + vitamin-packed
Jojoba oil → acne-friendly + balancing
Grapeseed oil → fast-absorbing + non-greasy
I avoid donut-glaze vibes on my face. You should too.
Glow is cute. Grease is a lifestyle choice I don’t support.
Each recipe below targets different skin moods, because skin has moods.
I keep the steps easy because life is complicated enough already.
1. Coconut + Honey Glow Scrub (Face & Body)
Best for: Dry, dull skin craving hydration
Why it works: Coconut nourishes + honey hydrates and heals
I mix sugar + coconut oil + honey to exfoliate and moisturize at the same time.
Honey works like a hydration and glow booster.
This scrub makes skin soft, smooth, and shiny in the good way.
Ingredients:
½ cup fine or coarse sugar
¼ cup melted coconut oil
2 tbsp raw honey
Steps:
I mix ingredients in a bowl.
I stir until smooth.
I scrub gently in circles.
I rinse and moisturize.
Ever wondered if your skin can glow instantly? It can.
This scrub proves it every time.
2. Lemon + Olive Oil Brightening Scrub (Body)
Best for: Dark patches + rough elbows/knees
Warning: Don’t use before sun exposure
I use lemon to brighten dark spots and olive oil to balance moisture.
Lemon fades spots and evicts dead skin buildup.
This scrub works insanely well on rough areas that overthink their existence.
Ingredients:
1 cup coarse sugar
½ cup olive oil
1 tbsp lemon juice
1 tsp lemon zest
Steps:
I mix sugar and oil.
I add lemon.
I scrub gently for 2 minutes.
I rinse well.
Ever wondered why elbows look darker than your soul on Mondays?
Dead skin buildup. Lemon fixes it. Sugar removes it. Problem solved.
3. Coffee + Brown Sugar Energizing Scrub (Body)
Best for: Pre-event smoothing + temporary firming
Truth: It blurs cellulite but doesn’t delete it
Coffee boosts circulation and tightens skin temporarily.
Brown sugar exfoliates without causing chaos.
This scrub gives you real-life Instagram filter skin.
Ingredients:
½ cup coffee grounds
½ cup brown sugar
¼ cup coconut or grapeseed oil
Steps:
I mix ingredients.
I scrub target areas.
I rinse thoroughly.
Do you want firmer skin before a big moment?
This scrub says yes every time.
4. Lavender + Almond Oil Calming Scrub (Face)
Best for: Sensitive, stressed skin
Bonus: Calms skin and nerves at the same time
Lavender reduces redness and irritation.
Almond oil hydrates without clogging pores.
Fine sugar keeps exfoliation gentle and safe.
Ingredients:
½ cup fine sugar
3 tbsp almond oil
6–8 drops lavender essential oil
Steps:
I mix sugar and oil.
I add lavender.
I scrub for 30 seconds.
I rinse and moisturize.
Ever wondered why lavender is skincare royalty?
It reduces redness, relaxes inflammation, and smells like calm itself.
5. Vanilla + Vitamin E Nourishing Scrub (Face & Body)
Best for: Dehydrated or rough-texture skin
Why it works: Vitamin E repairs + vanilla adds antioxidants
Vanilla smells amazing and delivers antioxidant benefits.
Vitamin E protects and improves texture.
This scrub works beautifully on neck, hands, and body.
Ingredients:
½ cup sugar
¼ cup almond or jojoba oil
1 vitamin E capsule
½ tsp vanilla extract
Steps:
I mix ingredients.
I scrub gently.
I rinse well.
I moisturize after.
Do you want silky soft skin? You do.
This scrub delivers that result fast.
6. Aloe + Mint Cooling Scrub (Face)
Best for: Oily or acne-prone skin needing calm and control
Why it works: Aloe reduces redness + mint balances oil
Aloe soothes irritation and cools inflammation.
Peppermint refreshes skin without clogging pores.
Jojoba oil balances acne-prone skin like a peace treaty.
Ingredients:
½ cup fine sugar
2 tbsp aloe gel
3 tbsp jojoba oil
3–5 drops peppermint oil
Steps:
I mix ingredients.
I scrub for 30 seconds.
I rinse well.
Ever wondered if you can scrub acne-prone skin safely?
You can. This recipe proves it.
How to Store Your DIY Sugar Scrubs
I always store scrubs in clean, dry, airtight jars.
Water invites bacteria to the party, and I hate uninvited guests.
I scoop with dry spoons, not wet fingers.
Storage tips:
Face scrubs → 1–2 weeks
Body scrubs → 2–3 weeks
Vitamin E extends shelf life
Store away from sunlight and heat
Do you want scrubs that stay good?
Store them properly. It’s non-negotiable.
How Often Should You Use Sugar Scrubs?
I scrub my body 2–3 times a week and my face 1–2 times a week.
Sensitive skin gets one gentle scrub weekly from me.
I always moisturize after because hydration completes exfoliation.
Ever wondered if scrubbing harder gives better results?
It doesn’t. It gives regret and redness.
Who Can Use DIY Sugar Scrubs?
Sugar scrubs work for most people.
Sugar dissolves, so it exfoliates gently and safely.
I avoid scrubbing open wounds, rashes, or unhealed acne lesions.
Safe for:
Dry skin
Oily skin (with jojoba or grapeseed)
Combination skin
Sensitive skin (with fine sugar)
Not safe for:
Broken or irritated skin
Active rashes
Do you want glow or chaos?
Exactly. Choose wisely.
The Real Reason I Switched to DIY Sugar Scrubs
I used to buy overpriced scrubs with fancy fonts and tiny product amounts.
I finished a jar in five uses and questioned my life.
Then I made my own and realized brands overcharge for sugar and oil like it’s gold dust.
DIY scrubs give me better results, cost less, and smell amazing because I choose the scent.
I control the ingredients, texture, and outcome.
Do you want control too? Make your own scrub.
You now have 6 DIY sugar scrub recipes for glowing, super-soft skin at home that you can make without a chemistry degree.
You learned the benefits, the oils, the rules, and the schedule.
You also learned that scrubbing harder doesn’t work, no matter what your intrusive thoughts suggest.
Try one scrub this week and let your skin glow like it got eight hours of sleep and a promotion.
You’ll love the results. I promise.
And if your bathroom smells like vanilla and lavender after, call it self-care.
Stay glowy. Stay soft. Stay sane.