Let’s be real for a second—nail salons are awesome, but sometimes, they’re also a pain. Waiting for an appointment, getting hit with hidden fees, or realizing halfway through that the salon music is basically a horror soundtrack…ugh. But here’s the good news: you can get a salon-quality manicure at home, save money, and actually enjoy the process. Trust me, it’s not rocket science, but there are some insider tips that will seriously level up your nail game.
I’ve spent more time than I’d like to admit experimenting with at-home manicures, and after plenty of smudged nails, uneven cuticles, and “why does this look terrible?!” moments, I’ve figured out a routine that works. I’m sharing it all here, so you can skip the mistakes and go straight to polished perfection.
Step 1: Gather Your Tools—Yes, the Right Ones Matter
You might think, “I can just use whatever I have lying around.” Nope. Not if you want that smooth, glossy finish without looking like you gave up halfway.
Here’s what you really need:
Nail Clippers and Files – Preferably a glass or crystal file. They’re gentle and prevent splitting.
Cuticle Pusher and Nippers – FYI, cutting cuticles too aggressively can lead to infections. Trust me, I’ve learned this the hard way.
Buffer Block – This is your secret weapon for a smooth nail surface.
Base Coat, Nail Polish, and Top Coat – Pick quality over quantity; cheap polish chips faster than you can say “oops.”
Nail Polish Remover – Non-acetone if you’re dealing with sensitive nails.
Hand Cream and Cuticle Oil – Because nothing ruins a manicure faster than dry, flaky skin.
Having the right tools makes the process smoother and your nails healthier. You’ll notice a huge difference even before you touch the polish.
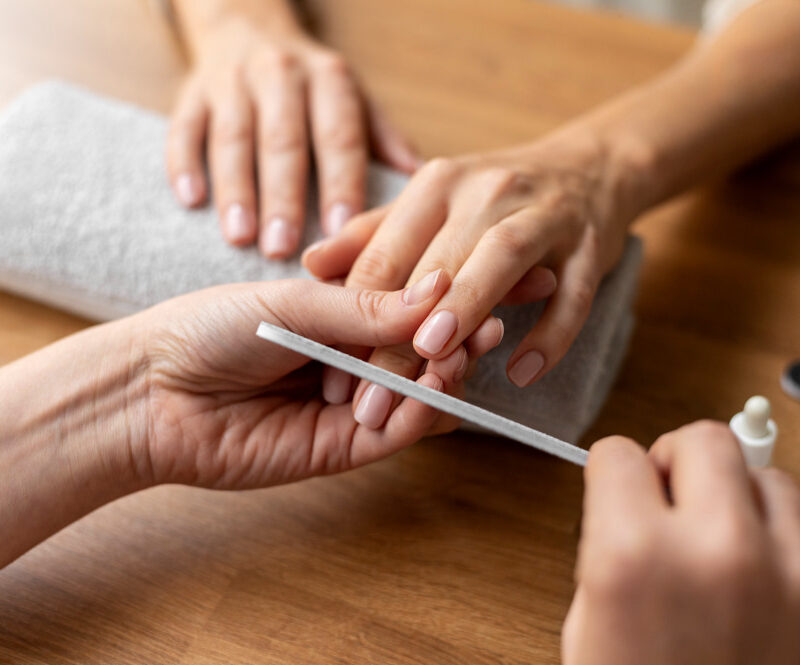
Step 2: Prep Your Nails Like a Pro
Prep is everything, my friend. You can have the fanciest polish in the world, but if your nails are greasy, chipped, or uneven, it’s not gonna look great. Here’s my routine:
Clean and Shape
Start by trimming your nails to your desired length. Then, gently shape them with a file. My personal favorite? Rounded or soft square edges—less chance of snagging.
Soak and Softening
Fill a bowl with warm water and add a bit of mild soap or a few drops of essential oil. Soak your nails for 3-5 minutes. This softens cuticles and preps your nails for polishing.
Cuticle Care
Push your cuticles back gently using a pusher. If there’s any excess, carefully trim it. FYI, going too crazy here can lead to bloody fingers, so patience is key.
Buffing
Use a buffer block to smooth out ridges. This step ensures your polish goes on evenly, giving that professional, glass-like finish.
Step 3: Nail Polish Application—The Real Deal
Okay, now we’re getting to the fun part: the polish. But here’s where most people mess up at home.
Base Coat First
Always start with a base coat. It prevents staining, strengthens your nails, and helps your polish stick. Skipping this is like baking a cake without greasing the pan—disaster waiting to happen.
The Polish Dance
Thin Layers – Two thin coats > one thick coat. Trust me, thick coats smudge and take forever to dry.
Center First, Sides Next – Start with a stroke down the middle, then fill in the sides. It feels tedious, but this method prevents streaks.
Cap the Tip – Swipe the polish along the nail edge. It reduces chipping and makes your manicure last longer.
Top Coat Magic
Seal it all with a high-quality top coat. This adds shine and durability. Bonus: some top coats dry super fast, which is a lifesaver when you’re impatient (which, IMO, we all are).
Step 4: Quick-Dry Hacks That Actually Work
Nothing ruins a perfect manicure faster than smudging it while checking your phone. Here are some tricks I swear by:
Cold Water Dip – After your top coat dries a bit, dip your nails in cold water for a few minutes. It helps the polish harden.
Quick-Dry Spray or Drops – They exist, and yes, they actually work. I was skeptical too, but FYI, they save lives.
Thin Layers Again – Seriously, this can’t be stressed enough. Thick coats take forever to dry.
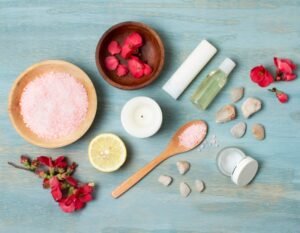
Step 5: Moisturize and Pamper
Salon manicures aren’t just about polish—they’re about feeling fancy. Don’t skip this step:
Massage Your Hands – Use a rich hand cream and gently massage into your fingers and palms. Instant spa vibes.
Cuticle Oil – Keeps your cuticles soft and nourished. Trust me, regular application makes your nails look healthier instantly.
Pro tip: If your hands are dry, your manicure might look rough, no matter how perfect the polish is.
Step 6: Maintenance Between Manicures
Getting salon-quality nails at home isn’t just about the initial session; it’s about maintenance. Here’s how to keep them looking fresh:
Reapply Top Coat Every 2-3 Days – This keeps your nails shiny and reduces chipping.
Moisturize Daily – Cuticle oil and hand cream are your BFFs.
Avoid Harsh Chemicals – Gloves, people. Dish soap, cleaning products, etc., can wreck your manicure.
Honestly, following these steps alone will extend your manicure life by days, sometimes even a week longer.
Step 7: Fun Add-Ons for That Extra Salon Vibe
If you really want your nails to scream “professional,” here are some little touches that make a huge difference:
Nail Stickers or Decals – Instant chic without the effort.
Glitter Tips or Accent Nails – I love adding a tiny sparkle here and there; it feels fancy without overdoing it.
Matte vs. Glossy Top Coat – Switch it up depending on your mood. Matte can be surprisingly classy.
Little details like this make a DIY manicure feel like a treat, not a chore.
Step 8: Avoiding Common Pitfalls
Even the best of us mess up sometimes. Here’s what I’ve learned to watch out for:
Skipping Base Coat – Stained nails are never cute.
Rushing Drying – Smudged nails = instant frustration.
Overdoing Cuticles – Painful and unnecessary.
Thick Polish Layers – We already talked about this, but it’s that important.
Honestly, avoiding these mistakes is half the battle.
Step 9: Product Recommendations (Because You Asked)
Since I know some of you are wondering, here are a few products I swear by:
CND Stickey Base Coat – Helps polish stick longer and prevents chips.
Zoya Nail Polish – Non-toxic, vibrant colors that last and don’t smell like a chemical factory.
Burt’s Bees Lemon Butter Cuticle Cream – Keeps cuticles super soft and nourished.
Revlon Glass Nail File – Affordable, durable, and gentle on nails.
FYI, you don’t need to buy everything at once, but having a few high-quality essentials makes your DIY manicure feel truly pro-level.
Step 10: Make It Fun, Not a Chore
The final tip? Treat it like a mini self-care session. Light a candle, put on your favorite playlist, pour yourself some tea or wine, and enjoy. Doing your nails at home doesn’t have to feel like a “task.” It can be your little slice of luxury without the crowded salon.
Plus, there’s something oddly satisfying about seeing your hard work shine on your nails. You did that. You’re basically a nail wizard.
Wrapping It Up
So there you have it: everything you need to get a salon-quality manicure at home. From the right tools, careful prep, perfect polish application, to little pampering touches, these steps will seriously upgrade your at-home nail game.
Remember: the key is patience, the right products, and enjoying the process. Trust me, your nails will thank you, your wallet will thank you, and honestly…you’ll feel like a boss every time you glance at your hands.
So go ahead—pick your favorite color, grab that top coat, and show off nails that scream professional polish without leaving the house.