Hey there! Ever looked at those salon prices and thought, “Why am I paying this much to remove a little hair?” Same. The good news? You can make your own natural hair-removal wax at home, with ingredients you probably already have. Not only is it cheaper, but it’s also free from all those sketchy chemicals.
I’ve been experimenting with DIY waxes for a while (yes, I’ve had my fair share of sticky mishaps), and I promise—once you get the hang of it, it’s surprisingly easy. So, grab a spatula and some patience, and let’s make 7 natural DIY wax recipes for hair removal.
1. Classic Sugar Wax (The “Honey” Alternative)
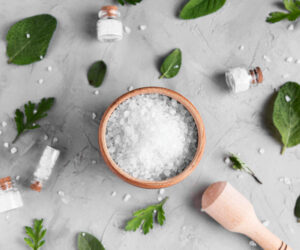
Sugar wax is basically the OG of natural hair removal. Sweet, sticky, and totally effective—plus, it’s easy to make with pantry staples.
Ingredients:
1 cup granulated sugar
2 tbsp lemon juice
2 tbsp water
Instructions:
Mix sugar, lemon juice, and water in a pan.
Heat on medium, stirring constantly, until it turns golden brown.
Let it cool slightly. It should be sticky but not burn-your-skin hot.
Apply in the direction of hair growth, press a strip of cloth over it, then pull against hair.
Pro tip: Sugar wax sticks to hair, not skin, so less ouch factor. IMO, it’s the most forgiving wax if you’re a newbie.
2. Honey and Lemon Wax (Gentle & Moisturizing)
Want something sweet AND skin-friendly? Honey not only helps the wax stick but also moisturizes your skin while removing hair.
Ingredients:
1/2 cup honey
1/4 cup sugar
1 tbsp lemon juice
Instructions:
Combine all ingredients in a saucepan and heat gently.
Stir until the sugar dissolves and the mixture thickens.
Let it cool until it’s warm to the touch.
Apply, cover with a strip, and pull.
FYI: This one’s perfect for sensitive areas because it’s less harsh than pure sugar wax.
3. Coffee and Sugar Wax (Extra Smooth Hack)
Coffee lovers, this one’s for you. The coffee helps exfoliate while the sugar removes hair. Double duty!
Ingredients:
1/2 cup sugar
2 tbsp coffee grounds
2 tbsp water
1 tbsp honey
Instructions:
Mix everything in a pan and heat until it becomes a thick, dark paste.
Let it cool to warm, apply in the hair direction.
Cover with a cloth strip, press, and pull.
Insider tip: The coffee also helps prevent ingrown hairs, which is a lifesaver if you’re prone to them.
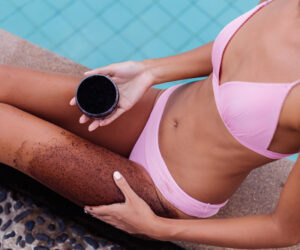
4. Coconut Oil Wax (For Super Sensitive Skin)
Coconut oil makes everything better, right? This wax is gentle, moisturizing, and perfect for sensitive skin.
Ingredients:
1/2 cup sugar
2 tbsp coconut oil
2 tbsp water
Instructions:
Heat sugar, coconut oil, and water in a saucepan.
Stir until it turns golden brown.
Cool slightly before using.
Apply to the area, use strips, and remove hair.
Tip: Coconut oil leaves your skin soft and less red than traditional wax. IMO, this is my favorite for legs.
5. Beeswax and Sugar Wax (Extra Grip)
Beeswax gives your DIY wax a firmer texture, which is great for small areas like the upper lip or eyebrows.
Ingredients:
2 tbsp beeswax pellets
1/4 cup sugar
1 tbsp honey
1-2 tbsp water
Instructions:
Melt beeswax gently, then stir in sugar, honey, and water.
Heat until thick and smooth.
Let it cool slightly, then apply with a spatula.
Cover with strips and pull against hair.
Pro tip: Use less water for a firmer consistency that works well on facial areas.
6. Chocolate Wax (Yes, Chocolate!)
Ok, this one’s just fun—and it smells amazing. Cocoa butter and chocolate help soothe the skin while waxing.
Ingredients:
1/4 cup sugar
2 tbsp cocoa powder
2 tbsp honey
2 tbsp water
Instructions:
Mix all ingredients in a pan and heat gently.
Stir until smooth and thickened.
Apply warm, cover with a strip, and pull against the hair.
FYI: It’s sticky, smells amazing, and makes your bathroom feel like a chocolate spa (bonus points if you sneak a taste).
7. Aloe Vera and Sugar Wax (Cooling Effect)
Aloe vera isn’t just for sunburn—it also calms skin irritation after waxing. Perfect for first-timers or sensitive areas.
Ingredients:
1/2 cup sugar
2 tbsp aloe vera gel
2 tbsp water
Optional: 1 tbsp lemon juice
Instructions:
Heat sugar, aloe vera gel, water, and lemon juice in a pan until thick.
Cool to warm, apply, and pull with a strip.
Rinse skin with warm water after waxing.
Tip: Aloe vera minimizes redness and leaves your skin soft. IMO, this should be your go-to if your skin tends to freak out after waxing.
Quick DIY Waxing Tips
Before you go full-on DIY wax master, remember these essentials:
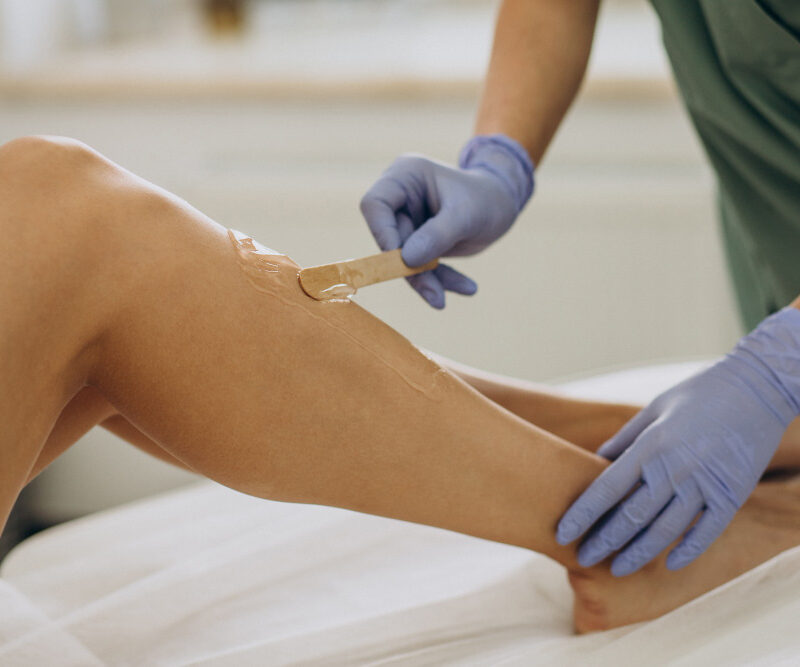
Test first: Always test on a small patch of skin to avoid burns or reactions.
Warm, not hot: Wax should be warm, not lava-hot. Nobody wants third-degree burns on their legs.
Pull against hair: Always pull in the opposite direction of hair growth for maximum efficiency.
Moisturize afterward: Aloe vera, coconut oil, or gentle lotion helps soothe your skin.
Strip-friendly: Cotton strips or old thin fabric work perfectly if you don’t have pre-made ones.
Why DIY Waxing Rocks
You might be thinking, “Why bother with DIY wax?” Well… here’s why I love it:
Cost-effective: Forget expensive salon sessions.
Natural ingredients: No mystery chemicals on your skin.
Control: Customize your wax consistency and ingredients for your skin type.
Convenient: Wax whenever you want, in your PJs.
IMO, once you go DIY, you’ll never want to go back to overpriced salon wax (unless you’re lazy, no judgment).
Final Thoughts
So there you go—7 natural DIY wax recipes that you can make at home for smooth, hair-free skin. From classic sugar wax to chocolate-scented fun, there’s a recipe for every type of skin and hair.
My personal favorites? Sugar and coconut oil wax for legs, and beeswax sugar wax for facial areas. They’re easy, effective, and gentle.
Next time you’re tempted to shell out for salon waxing, remember: you’ve got all the tools and knowledge to do it yourself. Stick to the recipes, keep some aloe handy, and embrace the slightly messy (but super satisfying) process.
Your wallet will thank you, your skin will glow, and honestly… there’s something kind of empowering about saying, “Yep, I did this myself.”