Let’s be real—nothing beats the feeling of silky-smooth skin after a good scrub. Seriously, it’s like your skin just got a standing ovation. If you’ve ever wondered how to achieve that glowy, soft, can’t-stop-touching-it skin without breaking the bank or resorting to crazy chemical-laden products, then a brown sugar scrub is your new BFF. Trust me, I’ve been there—messy bathroom, questionable music playlist, and somehow ending up with the softest elbows in the history of forever.
I’ve been obsessed with DIY skincare for a while now, and brown sugar scrubs aren’t just a cute Pinterest idea—they actually work wonders. Let’s break down everything you need to know, from the why to the how, and yes, even the fun little tweaks that make your skin feel like a million bucks.
Why Brown Sugar Scrubs Actually Work
Okay, let’s get one thing straight: brown sugar is more than just a sweetener for your morning coffee. It’s packed with properties that make your skin go, “Yaaas, thank you!”
Gentle Exfoliation
Brown sugar is soft enough to scrub off dead skin cells without tearing up your delicate skin. Unlike salt scrubs that sometimes feel like sandpaper, brown sugar gives you that exfoliation without the pain. Think of it as a mini massage for your skin—one that won’t leave you regretting life choices afterward.
Natural Moisturizing Power
Here’s a fun fact: brown sugar is a humectant. That’s fancy skincare lingo for “it draws moisture from the air into your skin.” So not only are you getting rid of dead skin, but you’re also locking in hydration. Talk about multitasking!
Boosts Skin Glow
Ever notice how your skin looks dull after a week of stress and Netflix binges? Brown sugar scrubs stimulate circulation while exfoliating, leaving your skin looking radiant and refreshed. Basically, it’s like coffee for your face—but way healthier and less jittery.
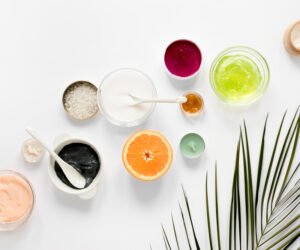
Ingredients You’ll Need
Here’s the fun part: the ingredients are cheap, easy to find, and probably already sitting in your kitchen.
Basic Brown Sugar Scrub Ingredients:
1 cup of brown sugar – The star of the show.
1/2 cup of coconut oil – Moisturizes and adds a lovely sheen.
Optional: 1 tsp vanilla extract or honey – For scent and extra skin-loving benefits.
Pro Tips:
Go for organic coconut oil if you can. It smells amazing and your skin will thank you.
If your skin is super sensitive, swap coconut oil for olive oil—still nourishing, just a little gentler.
Play with scents—essential oils like lavender or peppermint make your scrub smell like a spa exploded in your bathroom.
Step-by-Step DIY Instructions
Alright, let’s roll up our sleeves. Making this scrub is easier than your morning latte.
Step 1: Mix the Sugar and Oil
Grab a bowl and pour in your 1 cup of brown sugar. Slowly add the coconut oil, mixing until it’s a sand-like paste. Not too wet, not too dry—think Goldilocks, but with skincare.
Step 2: Add Optional Extras
This is where you get to be fancy: vanilla, honey, or essential oils. I personally love a drop of lavender—it makes the whole bathroom smell like a dream. Mix until everything is evenly combined.
Step 3: Store It Right
Transfer your scrub to a clean, airtight jar. FYI, it keeps for about 2 weeks at room temp, or up to a month in the fridge. Just make sure it doesn’t get too watery—otherwise, it’s a sticky mess.
How to Use Your Brown Sugar Scrub
Here’s where the magic happens. Using a brown sugar scrub isn’t rocket science, but there are some golden rules to maximize results.
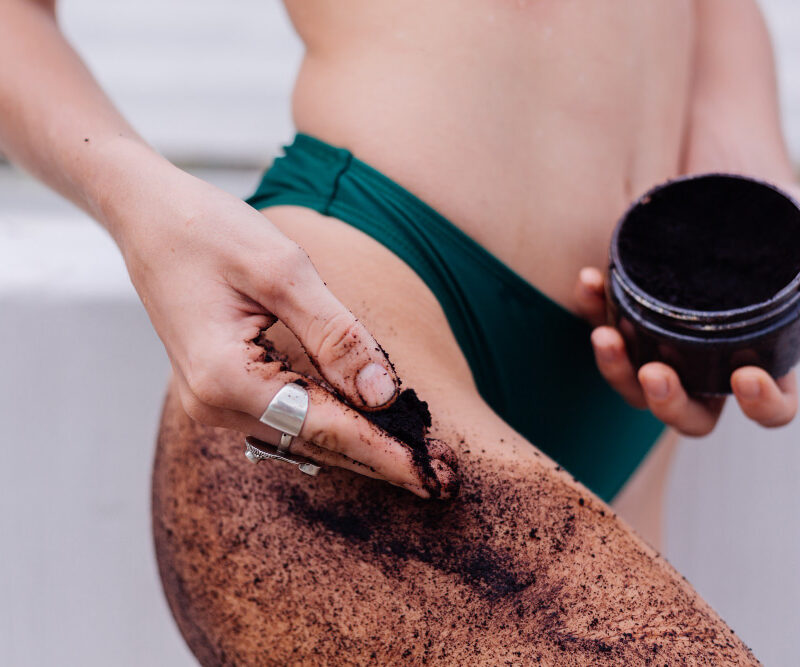
Body Application
Take a warm shower to open up your pores.
Scoop out a small amount of scrub.
Gently massage in circular motions, focusing on rough spots like elbows, knees, and heels.
Rinse thoroughly with warm water.
Pro Tip: Don’t go too hard! You’re exfoliating, not sanding a table.
Face Application
Use less sugar, about a teaspoon.
Massage gently on damp skin—forehead, cheeks, nose, chin.
Rinse with warm water and pat dry.
FYI: Your skin might get a bit red right after scrubbing—that’s normal. It should calm down in a few minutes, leaving you with a soft, glowing face.
Variations to Level Up Your Scrub Game
Because basic brown sugar is awesome, but we can totally get fancy. Here are some variations I’ve tried (and lived to tell the tale):
1. Coffee Brown Sugar Scrub
1 tbsp coffee grounds
Adds exfoliation and a caffeine boost to wake up your skin. Perfect for morning scrubs!
2. Citrus Glow Scrub
1 tsp orange or lemon zest
Gives a fresh scent and vitamin C boost. Bonus: smells like summer.
3. Honey & Oat Scrub
1 tsp honey + 2 tbsp finely ground oats
Extra soothing for sensitive skin. Honey locks in moisture, oats calm irritation.
Benefits Beyond Just Smooth Skin
You might be thinking: “Cool, my skin’s soft, but is that all?” Oh honey, no. Brown sugar scrubs do way more than just scrub off dead skin.
Boost Circulation: Rubbing in a scrub increases blood flow, which can help skin look more vibrant.
Helps with Ingrown Hairs: Regular exfoliation prevents hair follicles from getting clogged. Say goodbye to random bumps.
Stress Relief: There’s something oddly therapeutic about rubbing sugar on your skin. It’s basically mini-me time.
IMO, using a brown sugar scrub feels like giving yourself a little spa treatment at home, without the awkward small talk with a receptionist.
Common Mistakes to Avoid
I’ve made a few missteps on my scrub journey (and yes, my shower still smells like coconut oil sometimes). Here’s what to avoid:
Over-scrubbing: Be gentle. Your skin isn’t a car that needs polishing.
Using on broken skin: Cuts and scrapes + sugar scrub = ouch.
Skipping moisturizer: Even though sugar and oil hydrate, locking it in with a good moisturizer makes a huge difference.
Leaving scrub in a damp jar: Moisture + sugar = mold party. Not fun.
DIY vs Store-Bought Scrubs: Which Wins?
You might be wondering if it’s worth making your own. Here’s my take:
DIY Pros:
Control over ingredients (no weird chemicals).
Customizable scents and textures.
Cost-effective—your pantry already has most of what you need.
Store-Bought Pros:
Convenience.
Some have fancy formulas with rare ingredients like diamond dust (yeah, I don’t know who needs that either).
IMO, DIY wins for skin health, fun factor, and budget. Plus, you get the satisfaction of telling friends you made it yourself. Instant brag points.
How Often Should You Use a Brown Sugar Scrub?
Body: 2–3 times per week.
Face: 1–2 times per week.
Anything more, and your skin might get irritated. Anything less, and…well, you’ll miss out on that smooth, glow-up magic.
Final Tips for Maximum Glow
Warm showers = better results. Open pores make exfoliation more effective.
Follow up with moisturizer or body oil. Coconut, almond, or shea butter all work wonders.
Consistency is key. Scrub once, and you’ll notice some softness. Keep at it, and your skin will look and feel amazing.
Experiment! Swap oils, add a few drops of essential oil, or mix in coffee grounds. Your skin deserves some creativity.
Wrapping It Up
Honestly, brown sugar scrubs are a game-changer for anyone craving soft, glowing skin without spending a fortune on spa treatments. They’re easy to make, fun to use, and give results you can actually see and feel.
So next time you’re scrolling through skincare aisles thinking, “Do I really need another exfoliant?”—remember, your pantry probably already has everything you need. Scoop some sugar, mix with oil, maybe add a little honey, and voila: spa-quality skin treatment at home.
And hey, if your shower gets a little sticky in the process, just consider it part of the adventure. After all, glowing skin isn’t just a look—it’s a lifestyle (and a tiny sugar party in your bathroom).