Ever stared at a tiny jar of face cream with a not-so-tiny price tag and thought, “Wait… I could probably make this myself”? Yeah, same. I hit that moment a few years ago, right after I spent way too much money on something that promised “eternal glow” and delivered… meh. That’s when I started messing around with DIY face cream at home, and honestly? I never looked back.
If you love skincare and enjoy getting a little hands-on, you’re in the right place. Let’s chat about how to make your own face cream without turning your kitchen into a science lab or your skin into a regret experiment. Sound good?
Why Even Make DIY Face Cream at Home?
Let’s start with the obvious question: why bother making face cream yourself when stores already overflow with options?
You Control What Goes on Your Face
Your skin absorbs a lot of what you apply. That fact alone pushed me toward homemade skincare. When I make my own cream, I choose every ingredient.
That means:
No mystery chemicals
No artificial fragrances
No “what even is that?” label moments
IMO, that peace of mind feels priceless.
It Saves Money (Eventually)
Yes, the first shopping trip stings a little. Oils, wax, containers—it adds up fast. But once you stock the basics, each batch costs pennies compared to store-bought creams.
Ever calculated cost per jar? It gets addictive.
You Customize Everything
Dry skin? Add richer oils.
Oily skin? Keep it lightweight.
Sensitive skin? Skip irritants completely.
DIY face cream lets you design skincare around your actual skin, not marketing claims. How often does that happen?
What You Actually Need to Make Face Cream
Before you panic—no, you don’t need fancy lab gear. You probably own half of this already.
Basic Equipment
You only need a few simple tools:
Heat-safe glass bowl or measuring cup
Small saucepan (for a double boiler)
Whisk or hand mixer
Clean jars or tins
Spoon or spatula
FYI, cleanliness matters a lot here. I always sanitize everything first unless I want mold as a surprise guest later.
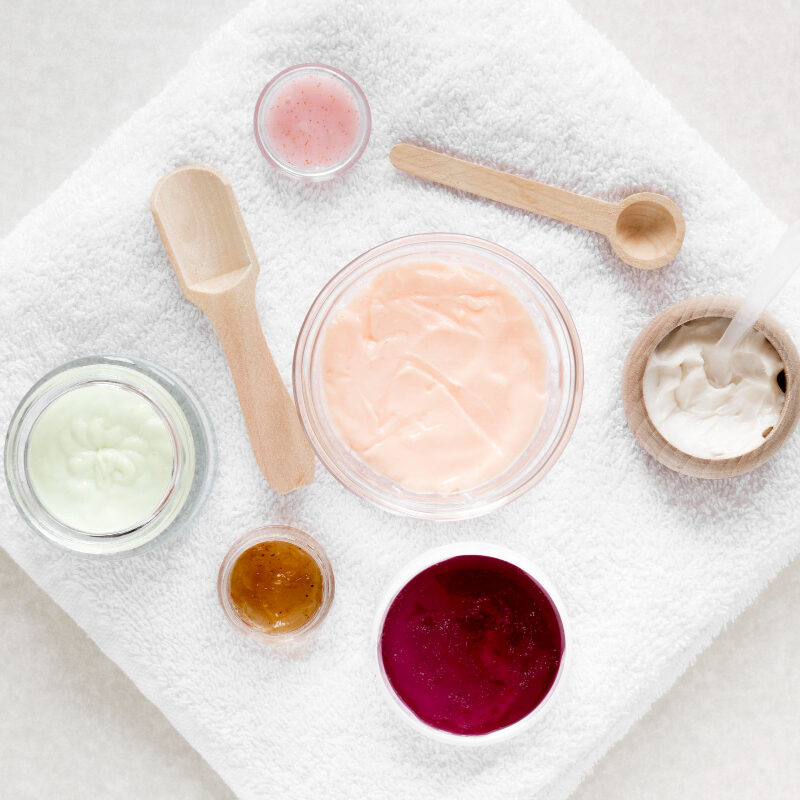
Core Ingredients Explained
Let’s break down the essentials without sounding like a chemistry lecture.
Every DIY face cream uses three main components:
Water phase – distilled water or floral hydrosols
Oil phase – nourishing oils and butters
Emulsifier – keeps oil and water from separating
Without an emulsifier, you’ll get oily soup. Trust me—I learned that the messy way.
Choosing the Right Oils and Butters
This part feels fun because oils actually do different things. You can mix and match based on your skin type.
Best Oils for Face Cream
Some of my go-to favorites include:
Jojoba oil – mimics skin’s natural oils
Sweet almond oil – lightweight and soothing
Argan oil – great for dry or mature skin
Grapeseed oil – perfect for oily skin
I usually blend two oils because my skin refuses to behave consistently. Anyone else?
Butters That Add Richness
Butters give cream its luxurious feel.
Popular choices:
Shea butter – deeply moisturizing
Cocoa butter – thick and protective
Mango butter – lighter and less greasy
If your cream feels heavy, cut back on butter. Your face will tell you fast.
Understanding Emulsifiers (The Glue of Your Cream)
This part sounds intimidating, but stay with me.
An emulsifier binds oil and water together so your cream stays creamy instead of separating overnight.
Common beginner-friendly emulsifiers include:
Emulsifying wax (most popular)
Olivem 1000
BTMS (also adds silkiness)
I usually use emulsifying wax because it behaves nicely and forgives mistakes. That matters when you multitask and forget timers—oops.
A Simple DIY Face Cream Recipe
Let’s get practical. This recipe works for beginners and produces a smooth, non-greasy cream.
Basic DIY Face Cream Formula
Water Phase
½ cup distilled water or rose water
Oil Phase
2 tablespoons carrier oil
1 tablespoon shea butter
1 tablespoon emulsifying wax
Cool-Down Phase
10–15 drops essential oil (optional)
Vitamin E capsule (optional preservative boost)
Simple, right?
Step-by-Step Instructions
Heat water phase in one container.
Heat oil phase in another container.
Use a double boiler until everything melts.
Slowly pour water into oils while mixing.
Blend continuously until thick and creamy.
Let it cool, then add essential oils.
Transfer to clean jars.
Ever watched liquid suddenly turn into cream? It feels oddly magical every time.
Essential Oils: Nice, Not Necessary
Essential oils smell amazing, but they’re optional. Your cream works fine without them.
Skin-Safe Essential Oils
If you choose to add them, keep it minimal.
Good options include:
Lavender – calming and gentle
Frankincense – great for mature skin
Tea tree – helpful for acne-prone skin
Use very small amounts. Essential oils pack power, not mercy.
And please—never apply undiluted oils directly to your face. That never ends well.
Common Mistakes (I’ve Made Them All)
Let me save you some frustration.
Using Tap Water
Tap water introduces bacteria. Always use distilled water or hydrosols unless you enjoy fuzzy surprises.
Skipping Preservatives
Homemade face cream contains water, which means bacteria love it.
Without preservatives:
Store in the fridge
Use within 1–2 weeks
With preservatives:
Lasts 3–6 months
I ignored this once. My nose never forgave me.
Overloading Ingredients
More isn’t better here. Too many oils confuse your skin and ruin texture.
Start simple. You can always tweak later.
How to Customize Your DIY Face Cream
This part feels like skincare LEGO.
For Dry Skin
Add:
More shea butter
Rich oils like avocado or argan
Dry skin loves thickness. Give it what it wants.
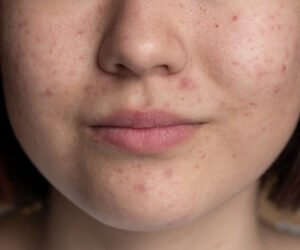
For Oily or Acne-Prone Skin
Use:
Grapeseed oil
Hemp seed oil
Aloe vera (replace part of water phase)
Lightweight formulas prevent clogged pores.
For Sensitive Skin
Stick with:
Minimal ingredients
No essential oils
Gentle oils like jojoba
Less drama equals happier skin. Always.
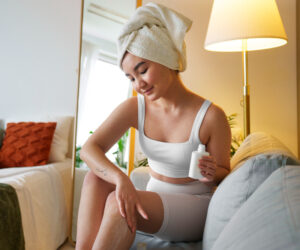
Storage and Shelf Life Tips
You worked hard—don’t let your cream spoil early.
Best storage practices:
Use airtight containers
Avoid dipping fingers directly inside
Store away from heat and sunlight
I prefer pump bottles because they reduce contamination. Plus, they feel fancy.
Homemade skincare deserves respect.
DIY Face Cream vs Store-Bought: Honest Comparison
Let’s be real for a second.
Store-Bought Creams
Pros:
Long shelf life
Stable texture
Convenience
Cons:
Preservatives and fillers
Higher price tags
Limited customization
DIY Face Cream at Home
Pros:
Total ingredient control
Custom formulas
Lower long-term cost
Cons:
Shorter shelf life
Learning curve
Requires effort
I still buy sunscreen and actives, but for daily moisture? DIY wins every time.
Is DIY Face Cream Worth It?
Short answer: yes—if you enjoy the process.
If you hate measuring, mixing, or cleaning bowls, store-bought works fine. No shame there.
But if you love skincare and creativity, homemade cream feels empowering. You stop guessing and start understanding your skin.
And honestly, watching your face glow from something you made yourself feels ridiculously satisfying.
Final Thoughts: Ready to Make Your Own?
Making DIY face cream at home doesn’t require perfection, fancy tools, or expert knowledge. It just requires curiosity and a little patience.
You learn as you go. You tweak formulas. You mess up once or twice. Then suddenly, you create something your skin actually loves.
So why not try? Worst case, you wash it off. Best case, you discover your new favorite skincare ritual.
And hey—if your first batch looks weird, welcome to the club. That’s how every good skincare story starts.