Hey, skincare enthusiast! Ever find yourself staring at your bathroom cabinet thinking, “Why am I paying $50 for a face mask I can barely pronounce?” Same. That’s exactly why I got into DIY skincare—it’s fun, customizable, and honestly, kinda satisfying to say, “Yep, I made that myself.” Today, I’m going to share some easy DIY skincare recipes you can make at home that are not only super effective but also budget-friendly. And yes, they actually work (I’ve tested them, so you don’t have to risk your face for science—unless you’re into that sort of thing).
Whether you’re battling dry skin, stubborn acne, or just want that glow everyone keeps raving about, I’ve got you covered. Let’s get into it!
Why DIY Skincare Is Actually Worth Your Time
Before we start whipping up jars of magic, let’s be real: DIY skincare isn’t just a trendy Instagram thing. There are legit benefits:
Full control over ingredients – No mystery chemicals or preservatives you can’t pronounce.
Customizable for your skin type – Sensitive skin? Dry skin? Oily skin? You can tweak recipes to fit exactly what your skin needs.
Cost-effective – Seriously, why spend $80 on a serum when you can make one for under $10?
Plus, making your own skincare is therapeutic. There’s something zen about stirring a little honey into coconut oil while chanting affirmations like, “I am glowing.”
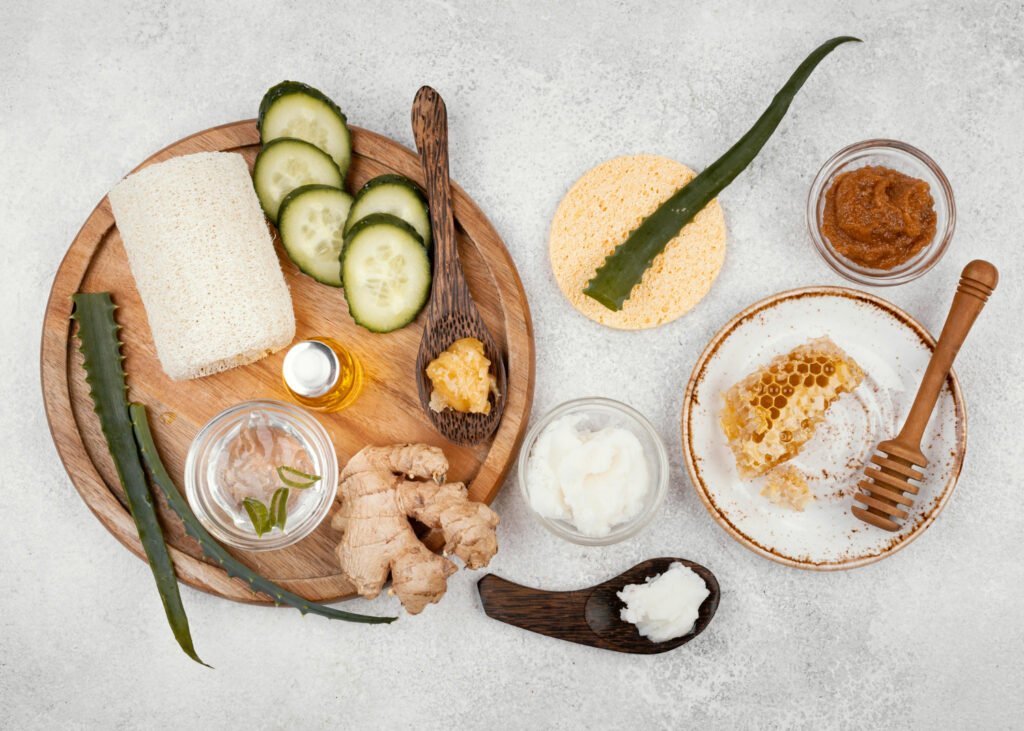
The Basics: Ingredients You’ll Want on Hand
Before diving into recipes, let’s talk ingredients. Trust me, stocking these is like building your own skincare arsenal.
Pantry Staples That Double as Skin Superheroes
Honey – Moisturizing, antibacterial, and perfect for masks.
Coconut Oil – Great for hydration, especially for dry skin patches.
Oatmeal – Soothes irritated skin and works as a gentle exfoliant.
Avocado – Packed with healthy fats to nourish your skin.
Yogurt – Lactic acid gently exfoliates while calming the skin.
Lemon Juice – Brightening and a natural astringent (use sparingly).
Essential Oils – Lavender for calming, tea tree for acne-prone skin.
FYI: Always do a patch test, especially if you’re trying something new. Your skin deserves love, not a chemistry experiment gone wrong.
Easy DIY Face Masks
Okay, now comes the fun part: masks. They’re easy, quick, and actually feel luxurious.
1. Honey + Oatmeal Soothing Mask
This one’s my personal favorite. My skin gets freakishly sensitive in the winter, and this mask is basically a cozy blanket for your face.
Ingredients:
2 tbsp oatmeal (finely ground)
1 tbsp honey
1–2 tbsp warm water or milk
Instructions:
Mix oatmeal and honey in a small bowl.
Add water or milk until it forms a paste.
Apply to clean skin and chill for 15 minutes.
Rinse with lukewarm water and pat dry.
Why it works: Oatmeal soothes, honey hydrates, and your skin comes out looking calmer and softer.
2. Avocado + Yogurt Hydrating Mask
Perfect for dry or tired skin. This mask feels creamy and indulgent—like a mini spa treatment without leaving your house.
Ingredients:
½ ripe avocado
2 tbsp plain yogurt
1 tsp honey (optional)
Instructions:
Mash avocado until smooth.
Mix in yogurt and honey.
Apply to your face, leave for 10–15 minutes, rinse.
Pro Tip: You can store leftovers in the fridge for 1 day, but honestly, it’s so good fresh that it usually disappears fast.
3. Lemon + Yogurt Brightening Mask
If your skin is looking a little dull, this one perks it up—think coffee for your face.
Ingredients:
2 tbsp yogurt
1 tsp lemon juice
1 tsp honey
Instructions:
Mix all ingredients until smooth.
Apply to face, avoiding sensitive areas around the eyes.
Leave for 10 minutes, rinse thoroughly.
Warning: Lemon juice can make your skin photosensitive, so do this at night or wear sunscreen after.
DIY Exfoliators for a Fresh-Faced Glow
Masks are great, but exfoliation is where the magic happens. Removing dead skin = instant glow.
1. Coffee + Coconut Oil Scrub
This is my go-to for mornings when I need to feel awake AND awake-looking. ☕
Ingredients:
2 tbsp coffee grounds
1 tbsp coconut oil
Instructions:
Mix coffee and coconut oil into a paste.
Gently massage onto damp skin in circular motions.
Rinse with warm water.
Why it works: Coffee stimulates circulation, coconut oil moisturizes, and your face will feel ridiculously soft.
2. Sugar + Olive Oil Scrub
Simple, classic, and works like a charm for lips, hands, or face.
Ingredients:
2 tbsp sugar (brown or white)
1 tbsp olive oil
Instructions:
Combine sugar and olive oil.
Rub gently on skin for 1–2 minutes.
Rinse off.
Extra Tip: Use this on chapped lips. Trust me, it’s better than any store-bought lip scrub.
DIY Serums & Oils
If you’re ready to level up your DIY skincare, homemade serums are a game-changer.
1. Vitamin E + Jojoba Oil Serum
Great for dry patches or just adding a nightly glow.
Ingredients:
2 tbsp jojoba oil
1 capsule vitamin E (poke and squeeze it in)
2 drops lavender essential oil (optional)
Instructions:
Mix in a small glass bottle.
Apply a few drops to clean skin at night.
Why it works: Jojoba mimics your skin’s natural oils, and vitamin E repairs and nourishes overnight.
2. Tea Tree Acne-Fighting Serum
For blemish-prone friends, this one’s your new BFF.
Ingredients:
1 tbsp aloe vera gel
3 drops tea tree oil
1 tsp jojoba oil
Instructions:
Mix all ingredients.
Dab lightly on problem areas at night.
Heads-up: Tea tree oil is potent, so a little goes a long way. Don’t overdo it.
Over-Exfoliating for That “Glow”
Exfoliation promises instant radiance. Overdoing it delivers redness, sensitivity, and breakouts. I learned that the hard way after chasing glass skin.
Signs You Exfoliate Too Much
Your skin burns when you apply products. It flakes for no reason. It suddenly reacts to everything.
Avoid exfoliation overload by skipping:
Daily scrubs
Multiple exfoliating acids
Rough physical exfoliants
Healthy skin glows naturally. It doesn’t need daily sanding.
DIY Toners You’ll Actually Want to Use
Toners are often overlooked, but they prep your skin to absorb moisturizers better.
1. Green Tea + Honey Toner
Ingredients:
½ cup brewed green tea (cooled)
1 tsp honey
Instructions:
Mix tea and honey.
Apply with a cotton pad after cleansing.
Why it works: Green tea is packed with antioxidants, honey adds moisture, and it smells amazing.
2. Rosewater + Witch Hazel Toner
Classic combo that balances skin pH and reduces redness.
Ingredients:
¼ cup rosewater
1 tbsp witch hazel
Instructions:
Mix together in a small bottle.
Apply after cleansing with a cotton pad.
Pro Tip: Store in the fridge for a refreshing morning boost.
Tips for Success With DIY Skincare
Patch Test First – Your skin is precious. Don’t skip this step.
Use Fresh Ingredients – DIY skincare doesn’t have preservatives, so freshness matters.
Keep It Clean – Wash utensils and containers to avoid bacterial growth.
Consistency Is Key – Like any skincare, results come with time. Don’t expect instant miracles.
Customize Recipes – Swap honey for agave, olive oil for almond oil. Make it your own.
Conclusion: Why You Should Start Making Your Own Skincare
So there you have it: easy DIY skincare recipes you can make at home that are fun, effective, and wallet-friendly. You don’t need a fancy lab, expensive serums, or a dermatologist (well, unless you have serious skin issues). A little honey here, some avocado there, and voilà—you’re on your way to radiant, healthy skin.
Honestly, once you start making your own masks and serums, it feels empowering. It’s like telling your skin, “I got you, fam.” Plus, the bragging rights aren’t bad either. Next time someone asks what moisturizer you’re using, you can casually say, “Oh, this? I whipped it up myself.”
So grab your bowls, your favorite ingredients, and maybe a Spotify playlist, because your DIY skincare journey starts now. Your skin—and your wallet—will thank you.