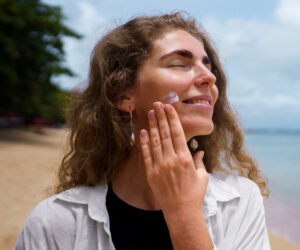
Hey there, fellow skincare enthusiast! Have you ever stared at your reflection and thought, “Hmm… I could use a little face sculpting without committing to a full-blown spa appointment or a mysterious injection I can’t pronounce”? Well, let me introduce you to Gua Sha—your new BFF in the world of glowing skin, sculpted cheeks, and stress-free mornings. I stumbled upon it a while ago and, honestly, it’s kind of life-changing. So, grab your favorite serum, and let’s chat about how you can start sculpting, lifting, and relaxing—right at home.
What Exactly Is Gua Sha?
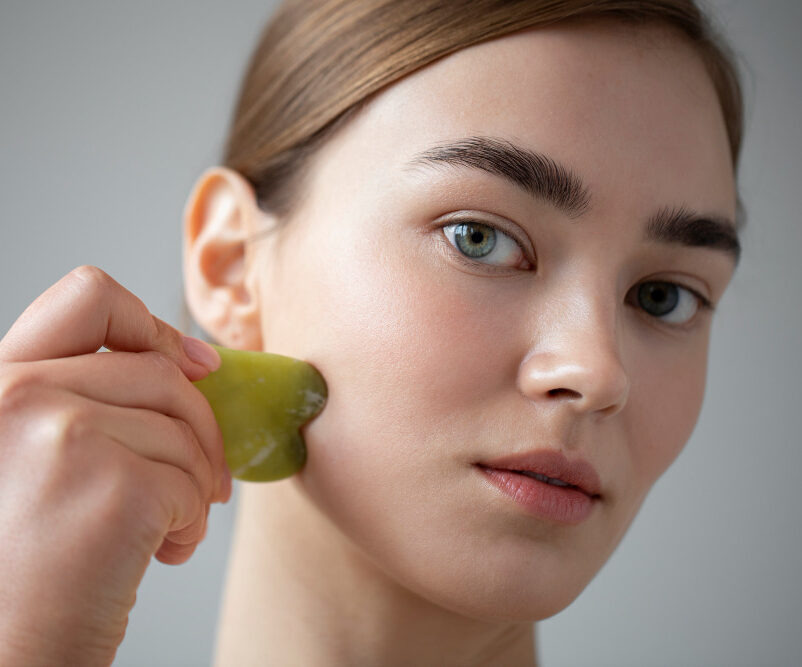
First things first—let’s clear up the basics. Gua Sha is a traditional Chinese technique that uses a smooth-edged tool, usually made of jade or rose quartz, to massage your face and body. The idea? Stimulate blood flow, release tension, and sculpt your features.
Think of it as giving your face a mini workout. And FYI, it’s not painful (though if you’re super tense, your face might feel a bit “ouchy” the first time).
Here’s what makes Gua Sha so cool:
Natural sculpting: Instead of clunky tools or invasive treatments, you get subtle lifting and contouring.
Relaxation benefits: It’s basically meditation for your face. Stress who?
Boosted circulation: Hello, radiant glow!
I’ll admit, I was skeptical at first. I mean, a little stone rubbing my cheeks could make me look like I just had Botox? But trust me, the results are legit—if you do it correctly.
Choosing Your Gua Sha Tool
Okay, here’s where it gets fun: picking your Gua Sha tool. It’s kind of like choosing your weapon in a skincare battle.
Types of Gua Sha Stones
Jade – Classic and calming. It’s been used for centuries and is believed to balance energy. Plus, it feels cool on the skin (love that).
Rose Quartz – For those romantic vibes. Supposedly promotes love and self-care, which IMO, we all need.
Bian Stone – A bit rarer, heavier, and yes, it’s a whole mood. It warms up nicely, which can help with tension.
Pro tip: Start with something smooth and not too heavy. You want a tool that glides without tugging. My personal fave? A rose quartz one—I just love that subtle pink glow on my vanity.
How to Prep for Your Gua Sha Session
Before you go full-on “facial sculptor,” you gotta prep. Rubbing a dry stone on your skin is basically a face exfoliation nightmare.
Step-by-step prep:
Cleanse your face: We don’t want dirt or makeup getting dragged around.
Apply oil or serum: Think jojoba, rosehip, or any lightweight facial oil. This lets the stone glide effortlessly.
Find a mirror: Not just for vanity purposes—seeing angles helps guide your strokes.
Quick anecdote: I skipped the oil the first time and ended up looking like I’d fought a cat. Don’t be me.
Mastering the Technique
Now comes the fun part—actually using your Gua Sha. You might think it’s as simple as swiping your cheeks like a frustrated window cleaner, but there’s a little technique involved.
The Basics
Always stroke outward and upward. Start at the center of your face and move towards your hairline.
Keep the stone at a 15-45 degree angle. Too flat, and it doesn’t work. Too steep, and your skin might protest.
Gentle pressure is key. You’re massaging, not sanding.
Key Areas to Target
Cheeks & Jawline: Use the flat side of the tool to sculpt your jawline. Imagine you’re subtly lifting your skin toward your ears. Instant cheekbone magic.
Under Eyes: Use the rounded edges gently. Avoid dragging too hard—your under-eye skin is delicate. FYI, I always do this last. The cool stone is perfect for puffiness.
Forehead: Glide upward from your eyebrows to your hairline. Great for tension headaches—seriously, try it, your brain will thank you.
Neck & Décolletage: Don’t skip this area! Gua Sha helps with lymphatic drainage, so you’ll feel lighter and less “puffy-face” in the morning.
The Science Behind It
Ever wondered why Gua Sha works so well? It’s not just hype. Here’s what’s happening under the hood:
Increased circulation: Your skin gets more blood flow, bringing nutrients and oxygen to the surface. Hello, that post-facial glow.
Lymphatic drainage: Swelling and puffiness get reduced naturally.
Muscle relaxation: Those tight jawlines and forehead frowns? Gua Sha can help release them.
IMO, it’s a holistic way to care for your skin without resorting to injections or harsh treatments. Plus, it doubles as a stress reliever—who doesn’t need that?
Common Mistakes Beginners Make
Let’s get real for a sec. I made a ton of mistakes when I first tried Gua Sha. Avoid these:
Using too much pressure: Your skin isn’t a sidewalk. Gentle is better.
Skipping oil: Remember what happened when I didn’t? Don’t repeat my mistake.
Dragging randomly: Follow the contour of your face. Think sculptor, not frustrated cleaner.
Neglecting consistency: One session won’t change your life. Make it a mini ritual, even 3–5 minutes daily helps.
Tips for Maximum Results
Alright, now that you’re armed with knowledge, let’s optimize:
Consistency over intensity: Short, daily sessions beat one long session a week.
Keep it cool: Pop your stone in the fridge for extra de-puffing power.
Pair with skincare: Use your favorite serum or moisturizer—it locks in hydration.
Listen to your skin: If it’s red or sore, ease up. Gua Sha shouldn’t hurt.
I love doing this while watching Netflix—it’s the ultimate self-care multitask.
Gua Sha vs. Other Face Sculpting Methods
So, how does Gua Sha stack up against, say, facial rollers or fancy spa treatments?
Gua Sha vs. Facial Rollers:
Gua Sha covers more surface area and gives a deeper massage.
Rollers are cute and relaxing, but IMO, they’re less sculpting, more “just rolling.”
Gua Sha vs. Spa Treatments:
Spa treatments can be expensive and time-consuming.
Gua Sha is DIY-friendly and surprisingly effective if done correctly.
Bottom line: Gua Sha isn’t a miracle cure, but it’s a gentle, natural way to lift, sculpt, and relax without draining your wallet.
When Not to Use Gua Sha
Let’s not get carried away. There are times when Gua Sha isn’t your skin’s BFF:
Open wounds or active acne flare-ups
Severe rosacea or extremely sensitive skin
Recent facial surgery or treatments
If in doubt, check with a dermatologist. Better safe than looking like a tomato, right?
My Personal Routine
Here’s how I actually use Gua Sha in my weekly routine:
Cleanse & oil up: Rosehip oil is my go-to.
Sculpt cheeks & jawline: About 1 minute per side.
Under eyes & forehead: Gentle upward strokes.
Neck & décolletage: 2–3 minutes, focusing on lymphatic flow.
Admire the glow: Okay, this is optional but highly recommended 🙂
It takes 5–10 minutes tops, and I swear it makes me feel instantly more awake and put-together—even before coffee.
Final Thoughts
So, why should you give Gua Sha a try? Well, it’s affordable, effective, and relaxing. You can sculpt your face, release tension, and boost your natural glow all in one mini ritual.
Remember: it’s about consistency, technique, and self-care—not chasing perfect results overnight. And if nothing else, it’s a reason to slow down, focus on yourself, and yes, look in the mirror without judgment for a few minutes.
Honestly, I think we all deserve a little self-care that’s fun, soothing, and actually works. Gua Sha might just be your new best friend. And who doesn’t love a friend who lifts your cheeks and spirits at the same time?
So grab a stone, put on some music, and start sculpting your way to happy, relaxed skin. Trust me, your face—and mood—will thank you.