Ever stare at your razor and think, “We need a break”? Yeah… same. I hit that moment when my skin started acting like I personally offended it. Razor bumps, irritation, and that lovely why-is-my-leg-on-fire feeling pushed me to try sugar waxing at home. And honestly? I never looked back.
If you want smooth skin without salon prices, you’re in the right place. Let’s talk about the sugar wax recipe, why it actually works, and how you can pull this off at home without panicking or gluing yourself to the bathtub. Been there. Learned lessons. Let me save you the drama.
Why Sugar Waxing Even Works
Sugar waxing sounds fancy, but it stays ridiculously simple. You use sugar, lemon, and water to remove hair from the root. That’s it. No mystery chemicals. No eyebrow-raising ingredient list.
Ever wonder why people swear by this method? Sugar wax sticks to hair, not skin. That difference matters more than you’d think.
Here’s why sugar waxing wins hearts fast:
It hurts less than traditional wax (IMO, and my pain tolerance stays low).
It exfoliates while removing hair, so skin feels extra smooth.
You clean it with warm water, not oil or prayer.
You can reuse the wax during the same session.
FYI, this method dates back centuries. Ancient people knew what they were doing. They just didn’t have TikTok to hype it up.
What You Need for a Sugar Wax Recipe
Before you start, check your kitchen. You probably already own everything.
Ingredients
You only need three things:
1 cup white sugar
2 tablespoons lemon juice (fresh or bottled both work)
2 tablespoons water
That’s it. No substitutes. No secret extras. Sugar wax hates freelancing.
Tools You’ll Want Nearby
Grab these before heating anything:
A saucepan
A wooden spoon or silicone spatula
A thermometer (optional but helpful)
Cotton strips or clean fabric
A heat-safe container
I skipped the thermometer my first time and guessed the temperature. Bold move. Bad choice. Use one if you can.
How to Make Sugar Wax at Home
This part scares people, but I promise it stays manageable. You just need patience and attention. Don’t scroll TikTok while cooking sugar. Ask me how I know :/
Step-by-Step Sugar Wax Recipe
Follow this exactly and life stays peaceful.
Add sugar, lemon juice, and water to the pan.
Heat on medium, stirring constantly.
Watch as it melts and turns golden.
Let it bubble gently for 5–7 minutes.
Remove it once it looks like warm honey.
You want a deep amber color, not dark brown. Burnt sugar smells awful and refuses to wax anything.
Let it cool for 10–15 minutes before touching it. Hot sugar behaves like lava. Respect it.
Getting the Consistency Right (Super Important)
Consistency decides success or chaos. No pressure, right?
Perfect Sugar Wax Texture
Your wax should:
Stretch slightly when lifted
Hold shape without running
Feel warm, not hot
If it runs like syrup, you need more cooking time.
If it hardens instantly, add one teaspoon of water, reheat gently, and stir.
Ever tried spreading cement on your leg? Yeah, avoid that.
How to Sugar Wax at Home (Without Crying)
Now comes the fun part. Or the intimidating part. Depends on your mood.
Prep Your Skin First
Never skip prep. Skin remembers everything.
Do this first:
Clean skin thoroughly
Dry completely
Lightly dust with cornstarch or baby powder
This step absorbs moisture and helps the wax grip hair, not skin.
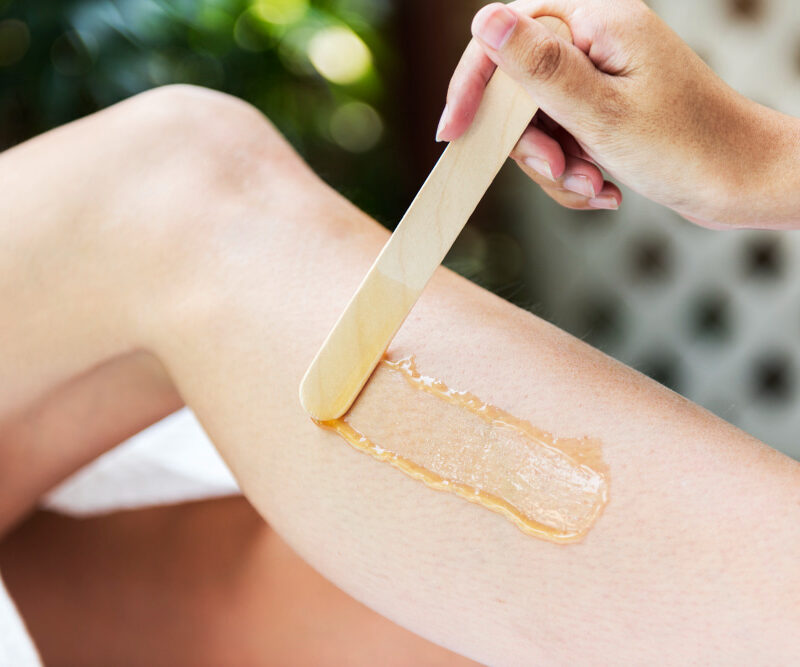
Application Method
Here’s where sugar wax shines.
Apply wax against hair growth.
Press gently.
Flick off in the direction of hair growth.
Hold skin taut every time.
That flick matters. Hesitation hurts more. Commit like you mean it.
Common Sugar Wax Mistakes (I Made Them All)
Let me save you some regret.
Mistake #1: Wax Too Hot
Hot wax equals panic dancing. Always test on your wrist first.
Mistake #2: Hair Too Short
Sugar wax grabs best when hair sits around ¼ inch long. Stubble laughs at wax.
Mistake #3: Overworking One Spot
Your skin needs kindness. Wax an area twice max, then move on.
Your future self will thank you.
Where Sugar Wax Works Best
Sugar waxing handles some areas better than others.
Best Areas
Legs
Arms
Underarms
Bikini line
Areas That Need Confidence
Face (upper lip works great)
Brazilian (possible, but mentally prepare)
I started with my legs. I don’t recommend going full Brazilian on day one unless chaos fuels you.
Sugar Wax vs Traditional Wax
Let’s settle this debate real quick.
Sugar Wax Wins Because:
Water-soluble cleanup
Lower burn risk
Less irritation
Natural ingredients
Traditional wax does remove thick hair faster sometimes. I admit that. But sugar wax treats sensitive skin way better long-term.
I pick comfort over speed every time.
How Long Results Last
When sugar wax removes hair from the root, results stick around.
Most people enjoy:
3–4 weeks of smoothness
Softer regrowth
Thinner hair over time
Shaving can’t compete. It barely lasts two days before betrayal begins.
Is Sugar Wax Good for Sensitive Skin?
Short answer: yes.
Long answer: absolutely yes if you prep correctly.
Sugar wax avoids resins and artificial fragrances. It also sticks mainly to hair, not skin. That combo makes it ideal for people who react easily.
If your skin throws tantrums regularly, sugar waxing might finally call a truce.
Can You Store Homemade Sugar Wax?
Yep, and that surprised me too.
Storage Tips
Store in an airtight container
Keep at room temperature
Reheat gently before reuse
It lasts several weeks if moisture stays out. If it smells weird or looks moldy, toss it immediately. Sugar shouldn’t smell suspicious.
Troubleshooting Quick Fixes
Let’s handle problems fast.
Too runny? Cook longer.
Too hard? Add water and reheat.
Not removing hair? Hair too short or skin too oily.
Hurts too much? Pull faster, not slower.
Sugar wax rewards confidence. Wavering just makes it dramatic.
Why I Still Use Sugar Wax
I started sugar waxing to save money. I stayed because my skin finally calmed down.
I love knowing exactly what touches my body. I love rinsing mistakes with water instead of scraping sticky disaster off my leg. And honestly, I love not booking appointments for something I can handle at home.
Does it take practice? Yes.
Does it beat razors long-term? 100%.
Final Thoughts on Sugar Wax Recipe (DIY Hair Removal at Home)
If you want smooth skin, fewer ingrowns, and full control, sugar waxing deserves a spot in your routine. The recipe stays simple, the results last longer, and your wallet breathes easier.
Start slow. Practice on easy areas. Laugh if things get messy. Everyone’s first batch looks questionable.
Once you nail the consistency, though? Game changer.
So… ready to break up with your razor and try something better? Your skin already voted yes.