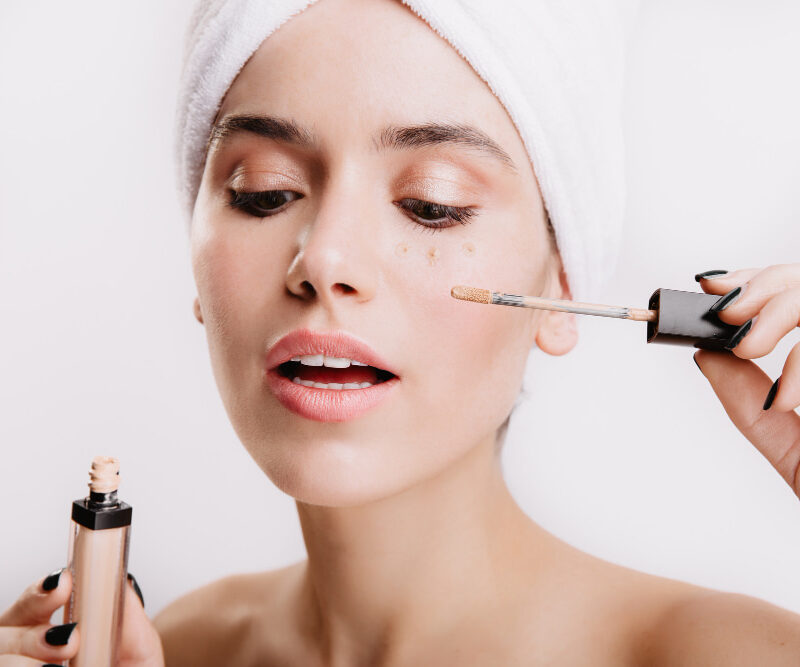
Let’s be real for a second—concealer can either make you look well-rested and glowing or like you lost a fight with your makeup mirror. I’ve lived both lives. One good swipe can fake eight hours of sleep, while one bad blend can scream “I tried too hard.” Sound familiar?
If you’ve ever wondered why your concealer creases, disappears, or somehow highlights the exact thing you wanted to hide, you’re not alone. I’ve messed this up plenty of times so you don’t have to. Let’s talk friend-to-friend about how to apply concealer perfectly—no gatekeeping, no makeup snob energy, just real tips that actually work.
1. Start With Skin Prep (Yes, It Actually Matters)
I know, I know. You want to jump straight to concealer. But hear me out.
Why prep changes everything
Concealer clings to dry skin like it’s auditioning for drama school. If your under-eyes feel flaky or tight, your concealer will snitch immediately.
Before you apply anything:
Cleanse your face
Use a lightweight moisturizer
Tap on eye cream (even a tiny amount helps)
I always wait about 30–60 seconds before going in with concealer. That pause alone prevents creasing. Ever notice how concealer behaves better on hydrated skin? Not magic—just science doing its thing.
2. Pick the Right Concealer Formula (IMO, This Is Huge)
Not all concealers want the same job. Some thrive under eyes. Others live for blemishes.
Match the formula to the problem
Use this as your cheat sheet:
Liquid concealer → under eyes, large areas
Cream concealer → redness, dark spots
Stick concealer → pinpoint coverage
I learned this the hard way after using thick stick concealer under my eyes and wondering why I looked 47 at age 23.
The right formula instantly makes concealer easier to apply perfectly.
3. Choose the Correct Shade (Not Just “Close Enough”)
This part trips up so many people.
Under-eye vs blemish shades
You actually need two different shades if you want flawless results.
Under eyes: go one shade lighter than your foundation
Blemishes: match your foundation exactly
When you use a light shade on pimples, you basically highlight them. That’s not the vibe. Matching your skin tone lets the concealer disappear naturally.
Ever wondered why your spots still show even with coverage? Yep—wrong shade.
4. Use Less Product Than You Think
This tip hurts a little because we all want full coverage instantly.
But trust me: more concealer = more creasing.
The “tiny dot” rule
Start with:
One small dot under each eye
A pin-sized amount on blemishes
You can always add more. You can’t easily remove cakey concealer without ruining everything else. I learned this during a rushed morning before brunch… and the photos still haunt me.
Less product blends smoother and looks way more skin-like.
5. Apply Concealer Strategically (Placement Matters)
Where you place concealer matters more than how much you use.
Under-eye placement that actually works
Instead of dragging concealer across your entire under-eye area, try this:
Place it at the inner corner
Add a dot at the outer corner
Blend upward in a soft triangle shape
This technique brightens the face and subtly lifts your features. FYI, this alone can make you look more awake without extra product.
Why cover everything when strategic placement does the heavy lifting?
6. Blend Like You Mean It (But Don’t Overdo It)
Blending sounds simple until it’s suddenly not.
Tools that actually work
Each tool gives a different finish:
Fingers: natural, skin-like, slightly sheer
Damp sponge: seamless, soft, beginner-friendly
Brush: fuller coverage, more precise
I personally love using my ring finger under my eyes because it applies the least pressure. Your skin stays happy, and your concealer doesn’t move everywhere.
Just remember: tap, don’t drag. Dragging pulls product away and invites creases to the party.
7. Let It Sit for a Few Seconds Before Blending
This tip changed my life a little. Not even exaggerating.
The “wait then blend” trick
After applying concealer, wait 20–30 seconds before blending.
Why it works:
The product thickens slightly
Coverage increases
You use less product overall
When I rush this step, my concealer looks thin and patchy. When I wait, it suddenly behaves like a professional makeup artist showed up.
Ever tried this and felt personally attacked by how good it looks? Yeah, same.
8. Set It Properly (But Gently)
Powder can save your concealer—or absolutely ruin it.
How to set without creasing
Use:
A finely milled loose powder
A small fluffy or tapered brush
Very little product
Tap excess off first. Then lightly press powder where concealer tends to crease.
Avoid baking unless you truly love that look. I bake only for events or long days. For everyday makeup, light setting keeps everything fresh and skin-like.
Too much powder turns concealer dry and heavy fast.
9. Don’t Use Concealer Alone—Blend With Foundation
This one sounds small, but it makes a massive difference.
Why layering matters
If you apply concealer on bare skin and stop there, it can look obvious.
Instead:
Apply foundation first
Then add concealer only where needed
Lightly blend edges into foundation
This trick helps concealer melt into your base instead of sitting on top like an awkward patch.
When everything flows together, your skin looks natural—even when coverage works overtime.
Common Concealer Mistakes (We’ve All Done These)
Before we wrap up, let’s call out a few sneaky mistakes.
Using concealer lighter than your under-eye darkness
Applying thick layers right away
Skipping moisturizer
Setting with heavy powder too early
Blending aggressively like you’re mad at your face
If any of those sound familiar… welcome to the club. We learn, we glow up, we move on.
How to Apply Concealer Perfectly: Quick Recap
Let’s bring it home.
To apply concealer perfectly every time:
Prep your skin first
Choose the right formula and shade
Use less product than you think
Place concealer strategically
Tap gently when blending
Let it sit before blending
Set lightly with powder
Blend it into foundation
That’s it. No 42-step routine. No stress. Just smart technique.
Final Thoughts (From One Makeup Lover to Another)
Concealer doesn’t need to be intimidating. It’s just makeup—not a moral test. Some days it looks flawless. Other days it creases by noon. Both are normal.
The key lies in understanding how to apply concealer perfectly for your own face, not copying someone else’s routine blindly. Experiment. Play around. Laugh when it goes wrong.
And next time your concealer looks ridiculously good? Please enjoy that moment. You earned it.