This post contains affiliate links. If you click a link and make a purchase, I may earn a small commission at no extra cost to you. I only recommend products I genuinely believe in. Thank you for supporting Amoria Style!
The decision to get curtain bangs is easy. The six to twelve months that follow are where most people lose confidence — not because the grow-out looks bad, but because nobody tells you what to expect at each stage or how to work with what you have rather than waiting for it to be over.
There are roughly five distinct stages between freshly cut curtain bangs and fully grown-out length. Each one has a look that works, a styling approach that helps, and a common mistake that makes it harder than it needs to be. Here’s all of it.
What Curtain Bangs Actually Are (And Why They Grow Out Differently)
Curtain bangs are face-framing pieces that part in the middle and sweep to either side — longer at the outer edges, shortest at the center. That graduated length is what makes them flattering across face shapes and what makes the grow-out more manageable than blunt or straight-across bangs.
Because the shortest point is at the center forehead rather than across the full fringe, curtain bangs grow out more gracefully. The center pieces reach the nose first, then the corners of the mouth, then chin length — at which point they’ve become face-framing layers rather than bangs at all. Understanding that trajectory makes each stage easier to navigate because you can see where you’re heading.
Growth rate varies, but the average is around half an inch per month. A freshly cut curtain bang sits roughly at eyebrow level at the center — which means you’re looking at approximately four to six months to reach a length that tucks fully behind the ear, and eight to twelve months to blend completely into the rest of your hair.
Stage 1 — Freshly Cut (Eyebrow to just below)
This is the stage most people are happiest with and the one that requires the least intervention. The bangs sit at eyebrow level at the center, sweep outward, and frame the face the way every curtain bang tutorial promised.
What works: Air drying with a round brush to direct the pieces outward as they dry. A small amount of lightweight oil or cream on the ends prevents them from flicking up or losing their sweep. For finer hair, a texturizing spray at the roots keeps them from going flat by midday.
The common mistake: Over-touching. Curtain bangs that are constantly pushed back or tucked behind the ear train themselves to sit that way — which defeats the purpose. Let them fall forward during the day and resist the habit of moving them.
The styling sweet spot: A center part with the bangs allowed to fall naturally, combined with loose waves or a low bun at the back. The contrast between the face-framing pieces at the front and the simplicity at the back is the whole point of the style.
Stage 2 — The Awkward Middle (Just below eyebrow to nose level)
This is the stage that catches people off guard. The center pieces are now long enough to fall into your eyes but short enough that they won’t stay tucked behind your ear. They’re also too long to look like intentional short bangs and too short to be ignored.
This is the stage where most people either reach for scissors or decide curtain bangs were a mistake. Neither is necessary.
What works: A small claw clip or a single bobby pin placed at the temple — not pulling the bangs fully back, but securing just enough of the outer piece to keep them from falling forward. This creates a pinned-back look that’s intentional rather than desperate. Alternatively, a half-up style where the top section (including the bangs) is gathered loosely at the crown makes the length a non-issue.
A light-hold styling cream applied before air drying encourages the pieces to sweep outward rather than fall straight down, which makes the length less obvious. The outward direction is everything at this stage — straight-down bangs at nose level look unfinished; swept-outward pieces at the same length look like face framing.
The common mistake: Trimming at home to get back to Stage 1. Unless you’re very confident with scissors, home trimming at this stage tends to create unevenness that extends the awkward period rather than resolving it.
The styling sweet spot: Textured half-up with the bangs loosely incorporated into the top section, or a soft wave through the lengths that gives the face-framing pieces somewhere to blend into.
Stage 3 — Chin Level (The Turning Point)
This is where the grow-out stops feeling like a problem and starts feeling like a style decision. At chin length, the center pieces are long enough to tuck behind the ear when you want to, long enough to create a defined face-framing effect when you don’t, and short enough to still have movement and shape.
A significant number of people stop here intentionally — chin-length curtain framing is a complete look in its own right, not a grow-out stage to push through.
What works: Everything. This is the most versatile stage. The pieces tuck behind the ear for a clean look. They fall forward for a soft, face-framing effect. They can be incorporated into a braid or a half-up style without looking like stray pieces. A barrel wave or a loose curl at this length creates a romantic frame around the face that photographs particularly well.
The common mistake: None specific to this stage — the main risk is getting a trim that takes you back to Stage 2 when you’re actually in the best part of the grow-out.
The styling sweet spot: Loose waves through the whole length with the face-framing pieces allowed to fall forward. Or a sleek straight style with the pieces tucked behind one ear and falling free on the other — asymmetry works exceptionally well at this length.
Stage 4 — Collarbone Length (Almost There)
The pieces are now long enough that they behave like layers rather than bangs. They frame the face from a longer point, they move with the rest of the hair, and they no longer require separate styling consideration. At this stage, most people have forgotten they were ever managing a grow-out.
What works: Treating the pieces exactly like the rest of your hair. They’ll naturally frame the face without any effort — the curtain bang cut creates a graduation that continues to flatter at this length even without the defined bang effect.
The common mistake: Over-layering at this stage. If you’re getting a trim, make sure your stylist knows you’re growing out curtain bangs — asking for “face-framing layers” can inadvertently shorten the pieces back toward Stage 2 if the stylist cuts aggressively.
The styling sweet spot: Anything. Blowout, air dry, braids, updos — the pieces integrate fully at this length and stop requiring a separate decision.
Stage 5 — Fully Grown Out (Blended)
The pieces have reached the length of the rest of your hair and are indistinguishable from layers. The grow-out is complete. If you loved the curtain bang look and want it back, this is the moment to decide — because at this point, getting them cut again takes you back to Stage 1 with full knowledge of what each stage involves.
A lot of people find they prefer the grown-out version. The soft face-framing effect that remains at full length — the graduation from the original cut — often continues to flatter without any maintenance or awkward stages. That’s one of the better arguments for curtain bangs over other fringe styles: even the end state of the grow-out tends to be a good look.
The Products That Help at Every Stage
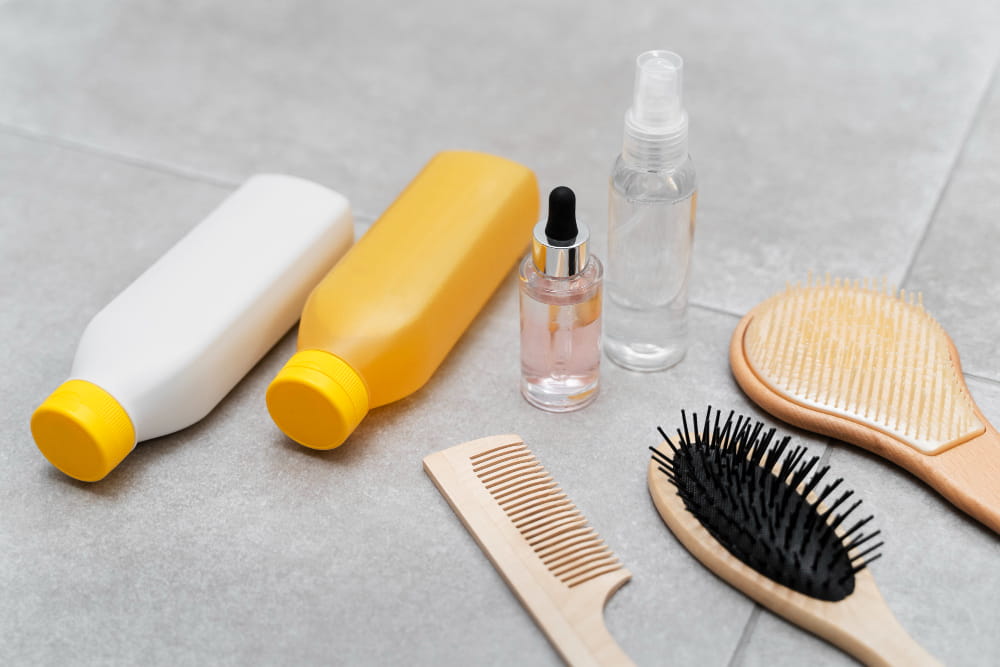
A lightweight styling cream — for encouraging the outward sweep at Stages 1 through 3. Heavy products weigh the pieces down and make them fall straight rather than sweep outward. Lightweight is the operative word.
A small round brush — for directing pieces while blow-drying at Stages 1 and 2. The outward direction needs to be set while the hair is warm and then held while it cools, which is easier with a brush than with fingers alone.
Mini claw clips or bobby pins — for Stage 2 specifically. Having these accessible means the awkward middle stage becomes a styling option rather than a daily frustration.
A satin pillowcase — underrated for bangs at every stage. Cotton pillowcases create friction that pushes pieces in whatever direction you sleep, which at Stage 2 in particular can mean waking up with bangs pointing the wrong way. Satin reduces that friction significantly.
One Thing Worth Knowing Before You Cut
Curtain bangs look different on different hair textures, and the grow-out behaves differently too. On straight hair, the sweep and the grow-out stages are predictable and manageable. On wavy or curly hair, the pieces will curl as they grow — which can look beautiful but requires more deliberate styling at each stage to maintain the outward sweep.
If you have wavy or curly hair and want curtain bangs, they’re worth getting — but worth getting slightly longer than you think, because curly hair springs up as it dries and the center pieces will sit shorter than they appear when wet. Tell your stylist to cut them longer than feels right. You can always take more off; you cannot put it back.
The information in this post is based on personal research and experience and is intended for educational purposes only. It is not a substitute for professional medical or dermatological advice, diagnosis, or treatment. Always consult a qualified healthcare provider before making changes to your skincare routine or health practices, especially if you have a medical condition or sensitivity.
